Wednesday, May 29, 2024

How Useful are Fishfinders?


I have two fishfinders on my boat. Both are made by Garmin and both are base models. I’ve been using them for about a year now and I have a rudimentary understanding of their capabilities. With that being said, I have yet to be able to claim that they have helped me catch many more fish that I probably wouldn’t have been able to catch independently. 

Do the fish finders show fish? Absolutely! Do I catch many of those fish? Nope! For example, I went fishing earlier this week and I actually forgot to turn the electronics on. I caught plenty of fish where I thought they would be. I caught redear, crappie, and bluegill. Yes, those are plentiful species and pretty easy to find most of the time. So maybe I was catching fish that a fishfinder doesn’t need to locate for me. 

On the other hand, I can think of only a handful of fish that I have caught that showed up on my finder and I fished for as a result. I have marked a lot of fish in places that I wouldn’t have fished in the past, but I’m still not catching those fish. So my question is, do I need a fishfinder at all?

I still believe I do but for less than obvious reasons. I like the fact that a fishfinder tells me water depth, water temperature, and boat speed. I can’t figure those things out on my own but a fishfinder can show me those things in real time. Do those things help me catch more fish? Probably not but I believe those are good pieces of information to know on the water. 

Will I ever sink a bunch of money into a fishfinder? Probably not for a lot of reasons. But will I always have one on my boat? Yes! While they are not the end-all be-all when it comes to finding fish, they DO help give a better understanding of the water I am fishing. I will gladly take more information while I’m on the water as opposed to not enough information. 

Wednesday, May 22, 2024

Woodburning Project- Part 2


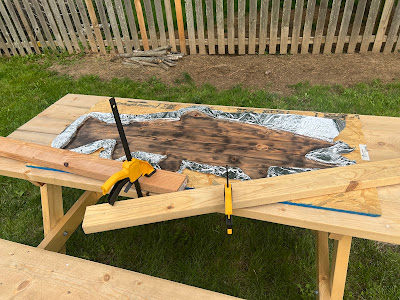
After talking to a few folks that I work with, the idea of wrapping the edges of the stencil I created with aluminum foil seemed to potentially offer some aid in getting clean lines from the torching process.  The hopes were that the foil would help to reflect heat and also create a tighter seal between the top of the picnic table and the stencil.  To also aid in getting more contact between the stencil and top of the table, I used a 2 X 4 and some clamps.  Later on I found out that these clamps would come in handy by keeping the stencil in place as well.  I had overlooked the fact that I needed to make sure the stencil didn't shift in location or I might lose my clean lines.

With everything sealed and clamped, I was ready to start torching some edges.  It didn't take long for me to realize that the torch wasn't going to work upside down.  I ended up tilting the table on its edge and that solved the problem.  With the torch being able to continuously work, I started to torch the edges of the stencil.  I made sure to start torching away from the edges and carefully work my way to the boundaries.  I didn't want to hit the edges with a flame that was too intense or at an angle that would usher the flame under the stencil.  

As I finished one edge, I removed one set of clamps, moved the set to the other side of the stencil, and then reset them.  I did the same thing with a second set of clamps.  This helped ensure that the stencil would not shift its position.  After I applied the same techniques to the opposite side, I was almost done.  All I needed to do was torch from the edges to the middle of the stencil.  This was less stressful but I still needed to be careful.  There is a difference between toasting and scorching wood.  I have learned that you can always burn a little more but can't remove the burn marks once they are present...unless you want to sand things down which I didn't want to do.

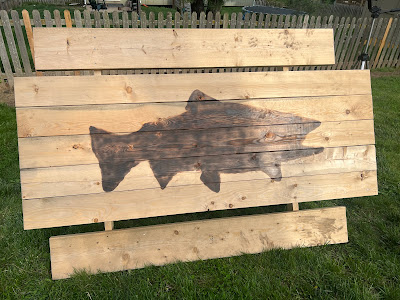
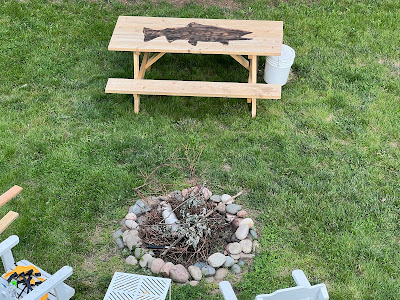
After everything was torched to satisfaction, it was time for the big reveal.  To say that I was nervous to see the final product would be a gross understatement.  The final product was there but I wasn't sure what it looked like.  I wasn't sure if success, failure, or somewhere in between laid under that plywood and foil.  I pulled my hat down low so that I couldn't see and then moved the board off the table.  I wanted to see it all at once, for better or worse.  To my amazement, it looked great!  The lines were pretty clean and you could tell that it was a fish!  I am thrilled with the results and now I'm thinking about other projects that I can apply this technique to.


Monday, May 20, 2024

Woodburning Project- Part 1


I just can't leave things alone.  When I see something that has a blank canvas, I want to put something on the canvas.  I mean that metaphorically.  I don't paint.  What I am referring to is the idea that if I own something that even has a remote possibility of having a fishing theme incorporated into it, I'm going to probably give it a shot.  I've slapped stickers on lunch boxes, my fly tying table, and truck.  I've made fishing collages and hung them in my house.  I've taken scrap wood and made it into something that commemorates memorable fish that I have caught.  So when I recently bought a cheap picnic table for my backyard, I saw a blank canvas that needed something...fishy.

As I stated, I can't paint.  I also can't draw freehand.  In other words, I have no artistic ability.  What I can do, is use technology to make up for my shortcomings, run some rudimentary power tools, and burn wood with a torch.  I have completed two steps to this project with more to come.  Here's what I have done so far.

1. Using a digital projector at my school, I projected an outline of a big brown trout onto a piece of plywood.  I then traced out the image.
2. I cut the image out with a jigsaw.  I used a plunge cut with the saw so that I would end up with a cast as well as a mold of the fish.  I wanted to avoid drill holes or having to make an entry cut and I have to say, I think it turned out pretty good.

More to come tomorrow, hopefully!  I will readily admit that this is one big experiment because I can't find anything online that outlines what I am attempting.  I'm not saying I'm some sort of groundbreaking pioneer or anything.  More than likely, I just can't use the right search terms.  While I am highly optimistic about how the next part turns out, I also know that the next steps could crash...and BURN!  (That's foreshadowing).


Thursday, May 16, 2024

Murdich Minnow and Conehead Madonna AKA Bunny Muddler


Link to Online Fly Shop: theshowmeflyguy.etsy.com

I love streamers! I love to tie them, I love to fish them, and I love it when a fish hits a streamer like a freight train. It’s even better if you get to see the take, but that’s not always something that happens. Regardless, I love chucking my 8 weight as far as I can and hooking up with a fish at some point during the retrieve. 

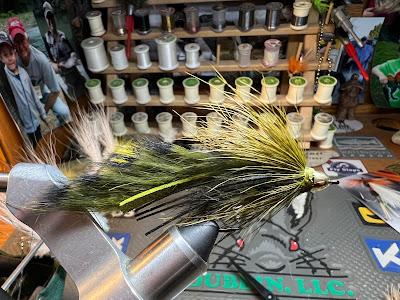
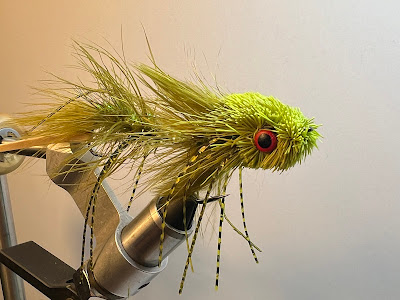
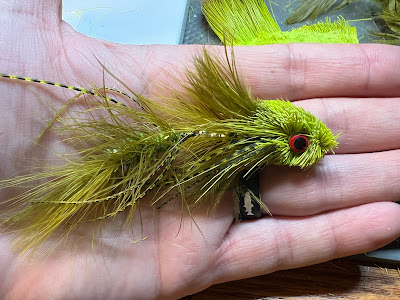
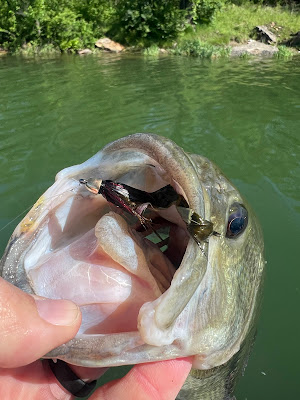
Over the course of the winter, I learned to tie a couple of new patterns.  The first one, which is pictured above, is a Murdich Minnow.  I have fished this fly for smallmouth bass before and it landed me a few.  I gave it a little more bulk in order to chase largemouth bass with it and I like how it turned out.  It barely sinks in the water which makes it versatile.  I can fish it with a floating fly line and fish it just below the surface with with a sinking like if I want to get down in the water column.  You can see that it is designed to have a shad color and profile but what you don't see is the rattle that is in the fly.  It makes a lot of noise and should attract some predators from a long distance.  I fished this fly in a farm pond earlier this spring and a 14 inch largemouth bass came from over 15 feet away to smash it!  On top of that, it was a visual eat and that bass never slowed down or hesitated.  

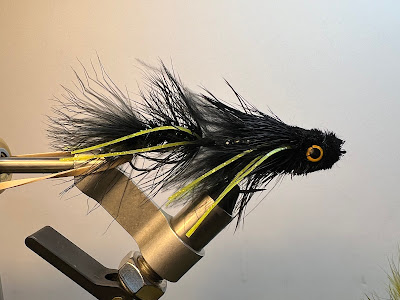
The second fly is a Conehead Madonna/Bunny Muddler.  This is a fly that has worked well for me in the past but for some reason, I just quit throwing it.  I'm not sure why but it's an effective pattern.  The rabbit strip gives it a good swimming action and the rubber legs give it some additional action.  The deer hair gives it some bulk without weight.  It also helps provide a good, tapered profile.  The lead wire behind the conehead and the conehead itself give the fly enough weight to get down if you're throwing floating fly line but it's light enough to fish on a sinking line as well.
Link to Online Fly Shop: theshowmeflyguy.etsy.com


Monday, May 13, 2024

Now That is a BIG Largemouth Bass!


I'm a lucky and fortunate guy!  I readily admit and acknowledge that.  Let me give you a prime example of what I'm referring to.  I've got a buddy named Chris.  I've written about him on this site a few times and included some pictures of him on social media so maybe you've seen or read about him before.  He's a very thoughtful and generous guy.  

One day, while attending a local fair/festival, he ran across a gentleman that was making chainsaw carvings.  The gentleman was taking requests and Chris asked if he could create a largemouth bass.  The way I heard the story was that the guy was somewhat taken aback.  It seems that he had never be given that request before.  He excitedly accepted the challenge and got to work.  Towards the end of the fair/festival that evening, he auctioned off his work and wouldn't you know it that Chris had the winning bid.  He told me that the bass was coming home with him and that the cost didn't really matter.  He told me all of this after he gave me the statue.

Shock is not a strong enough word to describe my reaction to Chris giving me this extremely lavish gift.  I honestly wasn't able to comprehend what my friend was bestowing upon me.  When it eventually set in that this was not a joke or prank, I was overwhelmed with emotion.  My friend had given me something that he knew I would appreciate and enjoy for many, many years.  I cannot tell Chris thank you enough.  I will attempt to pay him back one day but I highly doubt that I will be able to reach the height of the bar that has been set!

Friday, May 10, 2024

One of the Last Tying Skills I Needed to Learn!


I've been tying flies for about 20 years with 10 of them being serious.  For my first few years, I refused to tie anything that was complicated and stuck to simple flies that required a small number of materials and could be tied quickly.  Over the last 10 years, I've tried to branch out and get outside of my comfort zone.  I feel like I have done just that and I'm glad that I did.  With all of the tying skills that I have picked up from others, one has intimidated me for a couple of reasons.  I am referring to stacking deer hair.  

The first few times that I tried to tie with deer hair was ugly and I mean that literally and metaphorically.  I didn't follow instructions that were given, I didn't pay attention to detail, and things turned out about how you would expect...poorly.  Since then, I didn't want to tie with deer hair.  I always remembered my failures and didn't want to relive them.  However, after being pushed by one of my good friends (thank you Milo), I realized that I needed to revisit deer hair.  

This time, I was more focused.  I listened to instruction intently and followed directions carefully.  I paid attention to every wrap of thread and the amount of pressure that I was applying to the material.  If you have ever tied with deer then you know that attaching the material to the hook is only half of the task.  Trimming the deer hair to the shape that you want while using a double-sided, flexible razor blade is the next step.  Again, I attempted to lean heavily on the teachings of others and while the first few flies didn't turn out perfectly, I felt like I was headed in the right direction.  After tying another 4-5 flies, I had an "ah-ha" moment and it all clicked. 

I now feel like I can tie with and trim deer hair at a level that I feel comfortable selling flies that require this material and skill.  It was a good reminder of what it takes to learn a new skill and that learning takes time.  Sometimes learning something can come to a person quickly but everyone is going to struggle to learn and apply some concepts.  For some folks, it's algebra.  For some folks, it's learning Spanish.  For me, it was tying with deer hair.  However, things that require effort and focus, typically end up being more rewarding than things the come easily.  On top of learning a skill that makes a good-looking fly, I can attest that the flies can catch fish as well!


Tuesday, May 7, 2024

First Fishing Trip of the Season in the Boat


Last weekend, I was able to take my 16 foot jon boat for the first time this season.  While I have fished quite a bit this season, I have stuck to smaller bodies of water in my smaller boat and bank fishing up until this point.  I was incredibly nervous about getting it started and concerned about how it would run on the water after sitting in my garage for 6 months.  After some priming and choking (and maybe a little praying), it was music to my ears to hear the small 20 horse motor roar to life and purr like a kitten on the water.

My main objective was to clear some cobwebs out of the motor but my second goal was to target prespawn bass.  While I wasn't positive that the bass would be in prespawn mode on Lake Jacomo, it was my hope that they would be and thus, more aggressive.  That increased aggression, I was hoping, would make them more apt to hit a streamer.  While I didn't catch a lot of bass, I did catch the new "boat record" largemouth.  I started keeping track of big fish the first time that I put my boat on the water and it's just a way to make things more interesting and exciting when someone catches a nice-sized fish.  It also gives a nice reference point for us to compare fish to if someone is wondering if they caught an above-average sized fish.  

The bass I caught, while not a monster by any means, measured almost 18 inches long and broke the previous boat record of 15 inches.  It made a couple of acrobatic jumps and put up a heck of a fight!  It appeared to be spawned out (it looked a little skinny in the gut) but I'm not a bass expert so I could be wrong.  On the other hand, it was in the shallows (more specifically in vegetation) so maybe it was just a male with a high metabolism (kind of kidding, but maybe it was just struggling to catch food).  

Overall, it was a wonderful morning on the water!  The motor ran, the boat didn't leak, and I caught a nice bass on The Brave (my favorite streamer).  I'm already excited to get the boat on the water again and with only 13.5 days of school left, more days like this are hopefully on their way.  Speaking of way, Waylon had a good time too!


Thursday, May 2, 2024

Unhackled Buggers and Steel Bunnies


Within the last year, I have been experimenting with a couple of flies.  The first is a very simple but really effective fly.  Essentially, it is a wooly bugger without palmered hackle.  If you aren't familiar with fly tying, it's just a wooly bugger that is missing a feather.  I started fishing this fly to save money (hackle is a little pricey) and because it's easier/quicker to tie.  What I have found is that when compared to its counterpart, it isn't any less effective.  I tend to fish two of these at the same time with 12-18 inches of line between them.  I simply tie some fluorocarbon from the bend of the lead fly using an improved clinch knot to the eye of the second fly, again, with an improved clinch knot.  Even though I am not the most proficient caster in the world, I still don't end up with very many tangles.  This setup catches a lot of small largemouth, bluegill, and even crappie.  On three occasions last summer, I actually managed catching two fish at once!

The second fly that I have been playing around with is called a Steel Bunny.  This is a fly that incorporates a fish skull from Flymen Fishing Company as well as some Hareline laser dub, marabou, and a rabbit strip.  The fish skull is probably the most prominent part of this fly and makes this fly sink like a rock!  It is great to use with floating line or if you want to fish really deep with a sinking or sink tip line.  The profile and wiggle of the fly is great to fish for postspawn bass.  I haven't spent a lot of time on the water with it but it has proved to be a successful fly so far.  It still needs more time on the water to prove itself but the early impression is positive.  Both flies are for sale in my Etsy store and I am including aYouTube video if you're interested in tying your own Steel Bunny.

Online Fly Shop