

I was fortunate enough to harvest a buck during the firearms portion of deer season this year and one of my favorite things to do with the hide is to preserve the tail. It's easy to do and can provide you with cheap fly tying materials. It also adds to the nostalgic that is inherently present in fly tying. Most fly tyers appreciate the fact that they are creating the fly that will be used to catch fish. It helps the angler to feel more involved in the process and adds to the ownership of each fish. If you tie flies and hunt as well, using the hair from a deer's talk that you harvested, only adds to the reward of landing a fish on a fly you tied.
Here are the steps that I take to preserved the tail. They are pictured below. I will also post a follow-up post that outlines the rest of the steps as I get to them.
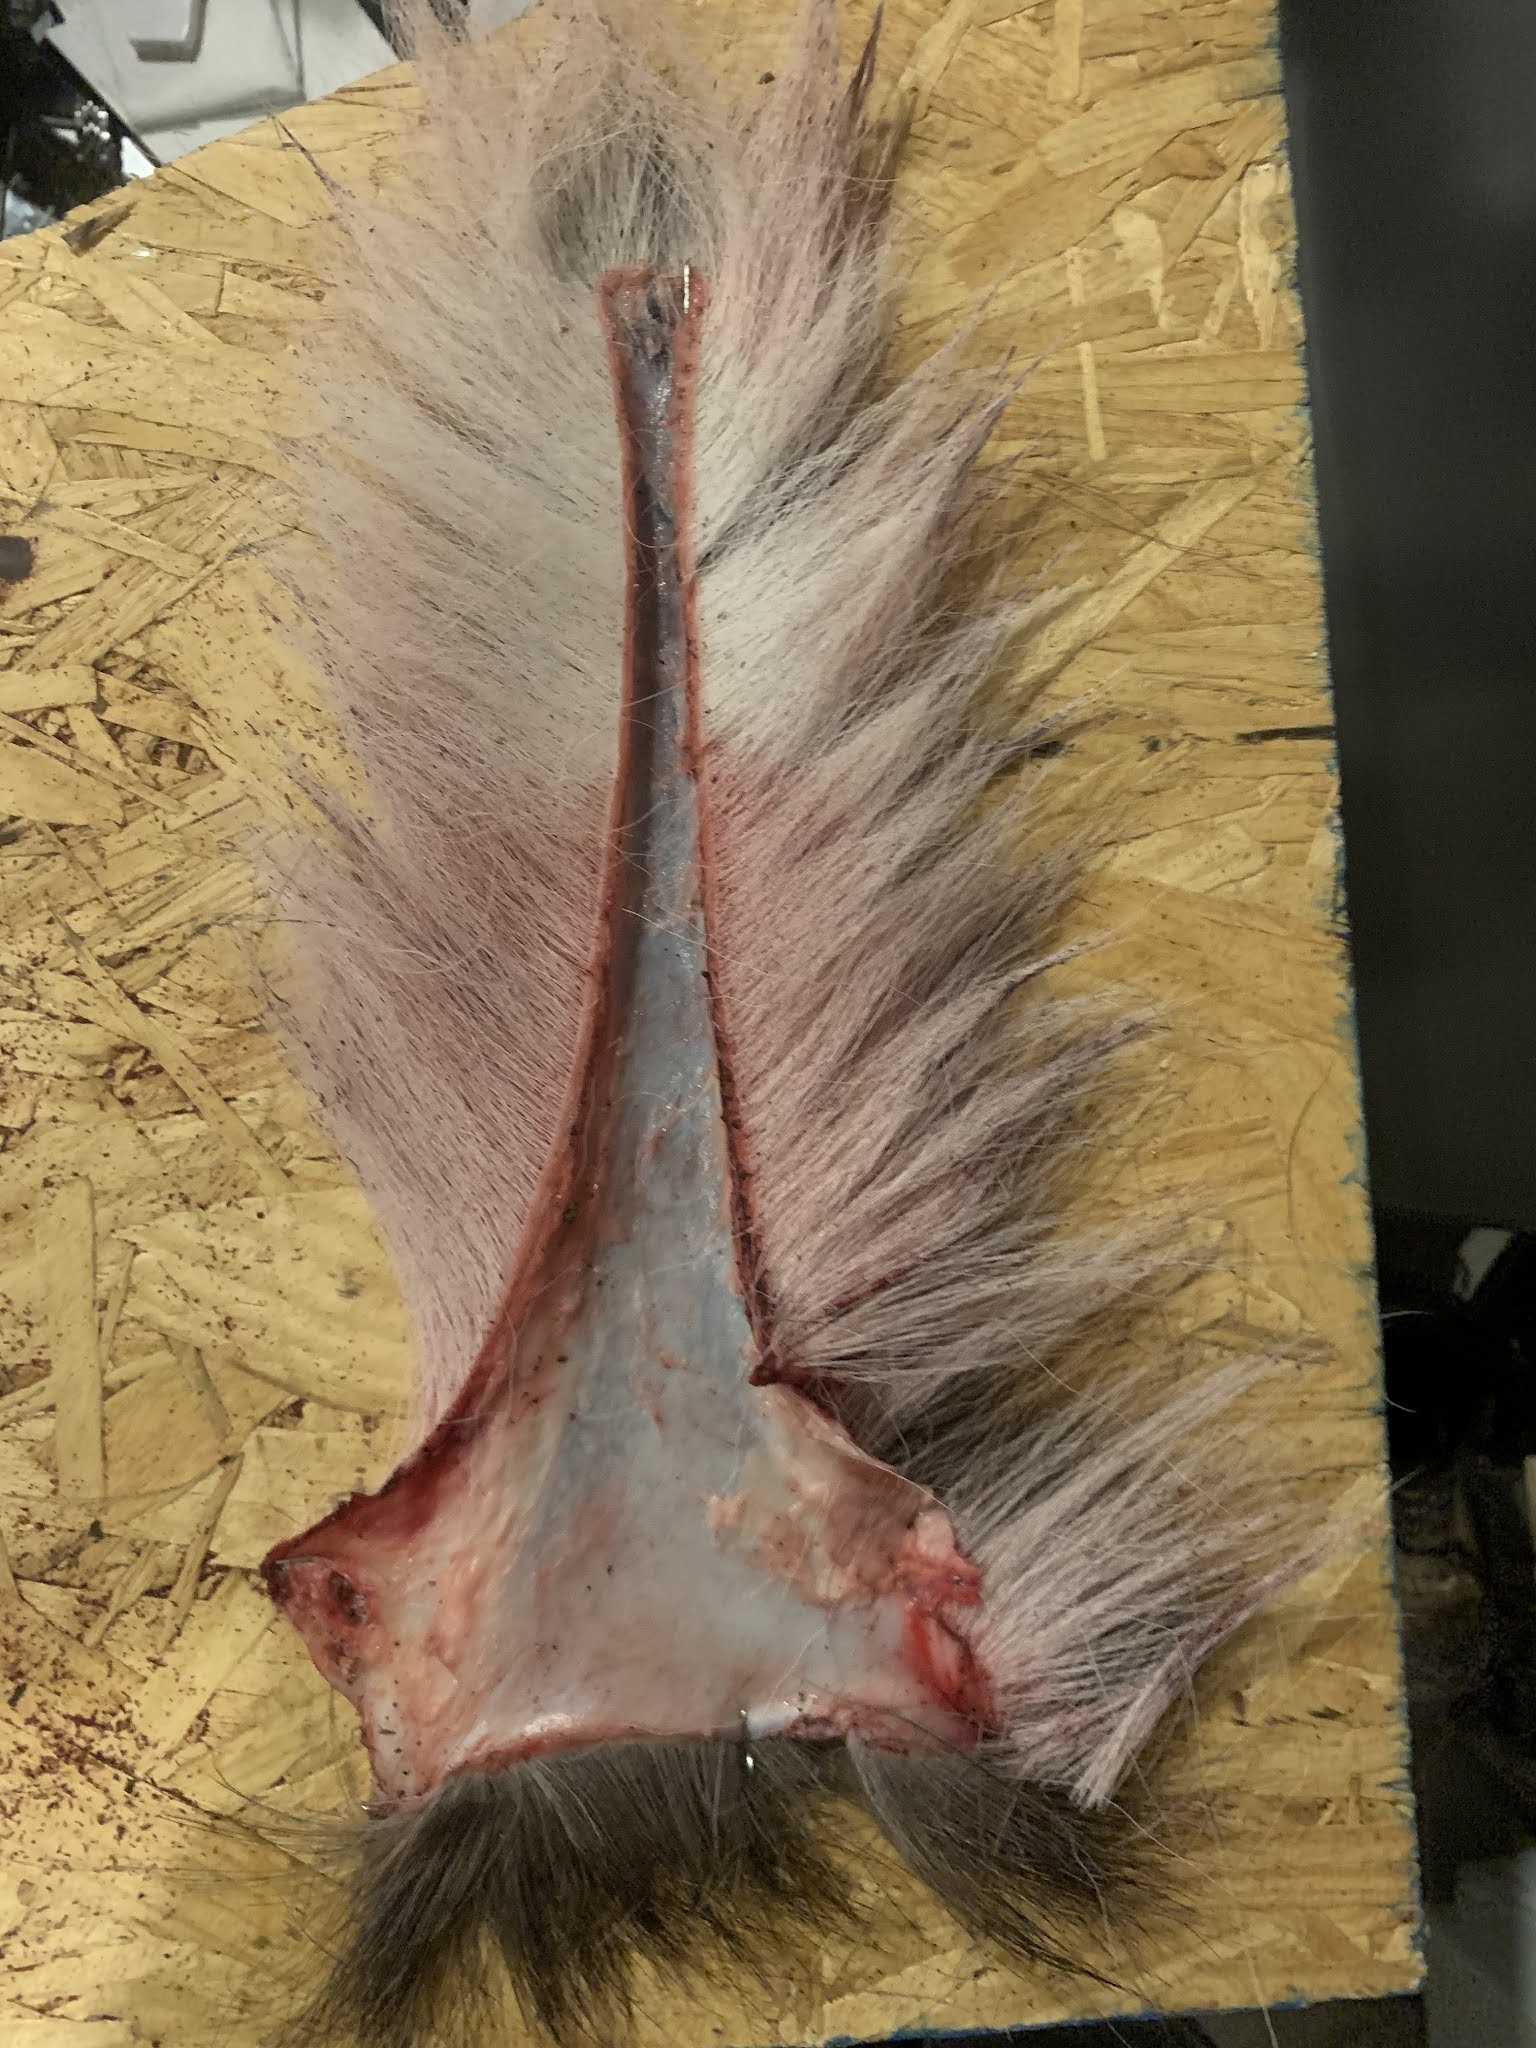
1. Cut the tail up along the middle of the bone on the white side of the tail. This is a whole lot easier if the tail is fresh. If you had to freeze the tail, make sure it is thawed out before you complete this step.
2. After removing the bone from the tail, attempt to remove all of the muscle and fat as well. A sharp knife should do the trick here.
3. I like to staple the tail to a sheet of plywood. A staple gun helps make sure the staple goes through the hide and into the wood. Make sure the skin is stretched between the staples as tightly as possible. This process also helps to expose all of the skin and allows me to work a good amount of salt into the hide. The salt dehydrates the skin and keeps it from decomposing.
4. Allow the salt to dehydrate the hide. When you feel like the salt is saturated, remove it with a dull knife or spoon. Your tool can also help to remove remaining muscle and fat. Reapply the salt and repeat this process until you feel like the hide is completely dry.
There will be a follow-up post next week (hopefully) to document the rest of this process.


No comments:
Post a Comment